
Opt-out from Web Archive
April 29, 2024


Automatic network discovery and documentation
NetBrain is a famous software that allows network discovery (and management). Let’s focus now on network discovery and documentation: we want to automatically discover network devices, and how they’re connected, and store everything into a version control repository (GIT/CVS).
So we want to:
- discover all network devices;
- map how they’re connected;
- track changes automatically;
- store everything into a version control repository (GIT/CVS);
- visualize any updated map with a simple browser.
How we can solve the above problem:
- we assume all devices by Cisco, so we can use CDP;
- we can get CDP data via SNMPv3;
- we can build a (source, destination) topology;
- we can store the topology into a revision control repository (GIT/CVS);
- we can use jsPlumb to render the (source, destination) topology into a web page.
netdoc
netdoc is the small experiment I wrote to solve the problem. It contains two Python scripts:
netdiscover.py: to discover network devices via SNMPv3 and generates two .ini files:discovered_nodes.ini: contains all network devices with some additional informationdiscovered_connections.ini: contains all network connections with some additional information
netplot.py: to plot a web page from the above .ini files.
.ini files can be stored in a revision control repository.
Running netconf
Currently, netdoc is a POC script, so maybe it can work on your infrastructure, maybe it won’t. To start it, run:
./netdiscover.py -u snmpv3user -p snmpv3password -h 10.1.1.4 -h 10.1.1.5 -h 10.1.1.6
The discovered_nodes.ini file contains all CDP discovered devices in the following form:
[AccessServer]
id = AccessServer
image = router.svg
disabled = false
platform = cisco 2610
The title is the CDP neighbor ID (usually the hostname); other attributes are:
- id: the CDP neighbor ID (usually the hostname)
- image: an image used to display the node in the web page
- disabled: true if missing during the last scan
- platform: the CDP neighbor platform
The discovered_connections.ini file contains all CDP discovered connections in the following form:
[AccessServer:e0/0-switch.example.com:gi2/0/46]
source = AccessServer
source_if = e0/0
destination = swipd002.campus.infocert.it
destination_if = gi2/0/46
disabled = false
The title is the source and destination CDP neighbor ID with interface names; other attributes are:
- source: the source CDP neighbor ID
- source_if: the source interface name
- destination: the destination CDP neighbor ID
- destination_id: the destination interface name
- disabled: true if missing during the last scan
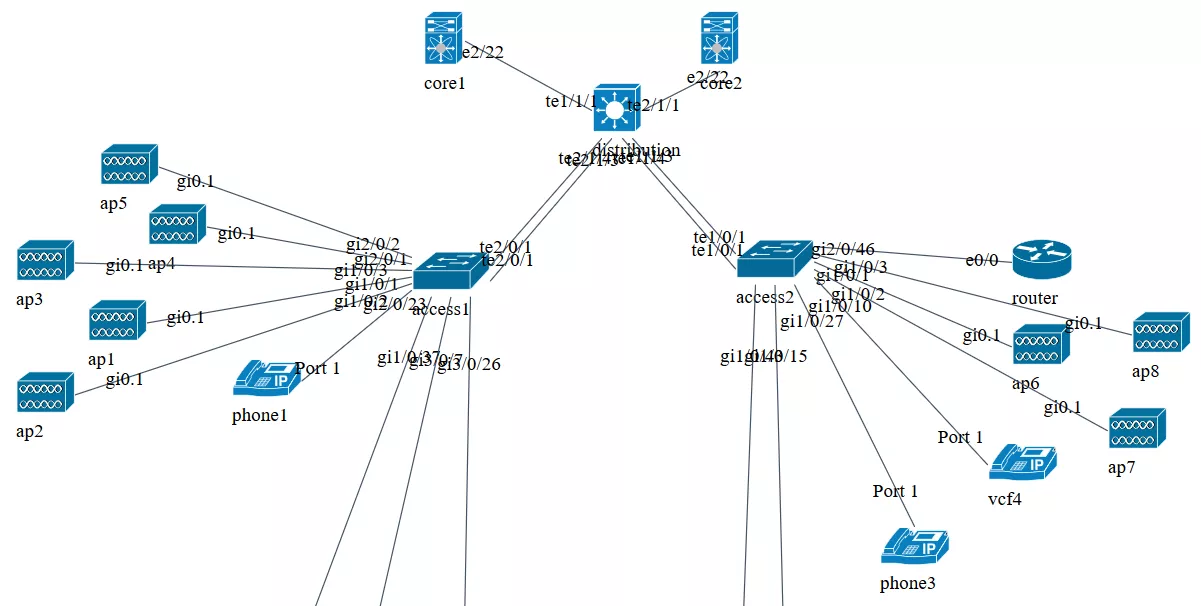
After a successful scan we can create the HTML page:
./netplot.py > netdoc.html
And here we go, a draggable web page: